# Writing documentation
# Introduction
The Pitcher JavaScript Platform documentation site is created with VuePress (opens new window). VuePress is a static site generator that generates HTML pages from Markdown (opens new window) files and is based on the Vue.js framework. It includes many out-of-the-box features such as syntax highlighting in code blocks, site-wide search, theme customization, the capability of using Vue components inside the documentation, and many more.
# Resources
# Official VuePress Documentation (opens new window)
The official VuePress documentation provides extended information on how to use VuePress and its advanced features.
# Markdown Guide (opens new window)
The Markdown Guide is a free and open-source reference guide that explains how to use Markdown, the markup language format we'll be using to write our documentation in VuePress.
# Prerequisites
The Pitcher JavaScript Platform is structured as a monorepo (opens new window),
the documentation resides inside the packages/docs directory of the monorepo root.
Before we get started, we'll need to to have Node.js (opens new window) >=12 installed on our machine. Then we need to install both Yarn (opens new window) (package manager) and Lerna (opens new window) (monorepo management tool) globally:
npm install yarn -g
npm install lerna -g
After installing Yarn and Lerna, navigate to the monorepo's root and install all the packages' dependencies with
yarn
# Typical Development Workflow Overview
The typical workflow for creating documentation inside the Pitcher JavaScript Platform is:
- Create a new
docs/your-branch-namebranch of thepitcher-js-platformrepository, or simply use your feature branch.TIP
Make sure you follow the conventional commits (opens new window) convention when committing your changes.
- Open a terminal window in the monorepo's root and run
yarn docs:serveon the command line. This starts the VuePress development server with automatic reloading. - Open a browser window to http://localhost:8080/ (opens new window) in order to see the live site.
- Create Markdown files (text files with
.mdextension) and save them in the relevant category directory insidepackages/docs. - Create new menu link entries in the sidebar by editing the relevant
sidebar.override.jsfile. - Make changes to your Markdown files or create new ones.
VuePress detects file changes and automatically and generates new output each time you save a file. - When you have finished making changes, create a pull request and add at least 2 reviewers.
- Merge the pull request when it gets approved.
- Deploy the documentation site if needed.
# Directory Structure
VuePress uses the directory structure and some configuration files to generate the documentation site.
The folder-naming convention needs to be followed for VuePress to successfully parse and compile the folders and files.
All the documentation is stored inside subdirectories in the package/docs folder.
packages
├── docs
│   ├── .vuepress
│   │   ├── components
│   │   ├── public
│   │   ├── theme
│   │   │   └── layouts
│   │   │   └── styles
│   │   │   └── index.js
│   │   ├── utils
│   │   ├── config.js
│   │   └── enhanceApp.js
│   │
│   ├── contributing
│   │   └── sidebar.override.js
│   ├── core
│   ├── guides
│   ├── i18n
│   ├── node_modules
│   ├── pitcherify
│   ├── babel.config.js
│   ├── Index.md
│   ├── package.json
│   └── vue.config.js
packages/docs: The folder in which all documentation is stored, organized by category subdirectories (e.gcontributing,core,guidesetc).packages/docs/Index.md: The landing page of the documentation.packages/docs/**/sidebar.override.js: Sidebar configuration for the current folder.packages/docs/.vuepress: Used to store global configuration, components, static resources, etc.packages/docs/.vuepress/components: The Vue components in this directory will be automatically registered as global components that can be used inside the.mdfiles.packages/docs/public: Used to store the generated static files.packages/docs/utils: Used to store JavaScript utilities that facilitate the creation/customization of the VuePress site.packages/docs/.vuepress/config.js: Contains site wide settings such as the Top navigation configuration.packages/docs/.vuepress/enhanceApp.js: Contains site wide enhancements such as loading the Vuetify framework and the Pitcherify components.
# Developing Documentation
In order to start developing documentation, run yarn docs:serve in the monorepo's root folder and open your browser to
http://localhost:8080/ (opens new window) so that you can see the changes live.
# Creating Markdown files
Documentation in VuePress is stored in Markdown format, so we'll need to create a .md file inside the relevant
documentation category folder.
If there's no relevant category folder we need to create one first.
As an example we're going to create an example "how to" document inside the packages/docs/guides/howtos category folder.
Open your favorite text editor and create a packages/docs/guides/howtos/example.md file with the following content.
# Welcome to the How-To Example

This is just example content inside a Markdown file.
The .md file must start with a header. It doesn't have to be an H1 (# as shown above) but it should be either H2 (##)
or H3 (###) for proper generation of search indexes and sidebars.
TIP
Since we don't have any sidebar configuration created for our new page yet, we must navigate to
http://localhost:8080/pitcher-js-platform/guides/howtos/example.html (opens new window)
in order to view the result. If you don't use sidebar.override.js file in the folder, VuePress should automatically add a new sidebar item for example.md. For more information check out the sidebar setup.
# Frontmatter
We can also use special frontmatter (opens new window) syntax in the Markdown files to instruct VuePress to provide title, what the next section would be, as well as other attributes. The frontmatter must be at the top of the Markdown file, and must take the form of valid YAML set between triple-dashed lines. Example:
---
title: How-To Example
tags:
  - how-to
  - example
next: /guides/debugging/ios
---
# Vue Components
Sometimes we need to provide code examples or a insert design element not available with plain Markdown syntax.
VuePress supports using Vue components in Markdown.
We can create Vue components inside the packages/docs/.vuepress/components directory.
Any .vue files in this folder will be registered globally and accessible from any of our Markdown files by directly
using the component name.
Example:
packages/docs/.vuepress/components/TestComponent.vue
<template>
  <div>This is a test component</div>
</template>
inside our Markdown file
# Example containing Vue component

This is just example content inside a Markdown file.

<test-component />
# Syntax Highlighting
We often need to display code examples inside our documentation. VuePress supports a special "backticks" syntax so that we can write code examples inside the Markdown files, and these will be displayed with the appropriate syntax. All we need to do is append a valid language alias to the beginning backticks for the code block:
Example:
```js
export default {
  name: 'MyComponent',
  // ...
}
```
will display
export default {
  name: 'MyComponent',
  // ...
}
# Inserting Images
We can insert images inside our documentation pages. It is recommended that we store the images inside an assets folder
in the category we are creating docs for. For example in order to insert an example.png image into the
packages/docs/guides/howtos/example.md file:
- Copy the
example.pngimage into thepackages/docs/guides/assetsfolder - Then include the image inside
example.mdusing the following tag:

You must pay special attention in that you must reference the image assets using relative URLs.
# Learn more about Markdown
VuePress supports many Markdown extensions and advanced features. You can learn more about how you can use Markdown inside VuePress pages in the official documentation here (opens new window)
# Sidebar setup
# Automatic way of generating sidebar
By default, the sidebar is generated relatively to your files and folders. It works as following:
- For each
.mdfile under root folders (docs/core,docs/guidesetc.), an item will be added to the sidebar - For each folder with child
.mdfiles under (inside in root folders), a group and child items will be added to the sidebar - Sidebar creation logic ignores:
_assets,_examples,_components,node_modulesand.vuepressfolders
# Naming sidebar items
Sidebar items are named after the first title you add to your .md file. If you would like to customize the title, you could use frontmatter in your .md files like:
---
title: Sidebar Title
---

# Very long title here
# Sidebar items order
In some cases you might need to have a specific order in your sidebar items. It is recommended to override sidebar configuration when the case occurs but you have have a couple of different options as well.
Let's say you have readme.md file which you want it to be first item in the sidebar. First way to achieve this is changing the order through frontmatter:
---
sidebarOrder: 1
---

# Readme
Second way is adding a prefix to the file like: readme.md to 01-readme.md (works for folders as well). The prefix will not be added to the sidebar, also the routing will be overwritten to remove prefixes as well.
# Overriding sidebar configuration
In order to add our .md file to the site's sidebar as a link, we have to explicitly define it inside the sidebar.override.js file
that is present inside every documentation folder (it needs to be created if doesn't exist).
The sidebar.override.js file, in it's basic form, exports a newSidebar Array that contains links to the .md files.
Example:
module.exports = (sidebar) => {
  const newSidebar = [
    '/core/',
    '/core/config.md',
    '/core/database.md',
    // ...
  ]
  return newSidebar
}
We can omit the .md extension, and paths ending with / are inferred as */README.md.
The text for the link is automatically inferred (either from the first header in the page or explicit title in YAML front matter).
In case we want to group several .md files into one collapsible sidebar entry, we can use the following syntax:
module.exports = (sidebar) => {
const newSidebar = [
'/guides/',
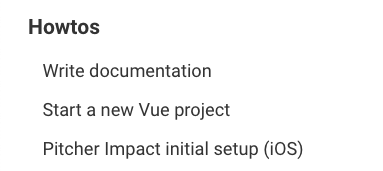
{
title: 'Howtos',
collapsable: false,
sidebarDepth: 2,
children: [
'/guides/howtos/write-documentation',
'/guides/howtos/new-project',
'/guides/howtos/setup-ios-simulator',
],
},
// ...
]
return newSidebar
}
In the example above, the "Howtos" entry will be created, containing links for write-documentation, new-project,
and setup-ios-simulator.
WARNING
In case the sidebar.override.js file is missing, VuePress will auto-populate the sidebar by reading the folder contents.
This might result in entries appearing in a not desirable order etc. For this reason it's advisable that there is always a
sidebar.override.js file with explicitly defined menu entries, inside every documentation folder.
# Top Navbar setup
When a new main documentation category gets created, we also need to add a link to the top navbar
by editing the nav Array inside the packages/docs/.vuepress/config.js file:
  nav: [
    { text: 'Core', link: '/core/' },
    { text: 'Pitcherify', link: '/pitcherify/' },
    { text: 'i18n', link: '/i18n/' },
    { text: 'Guides', link: '/guides/' },
    { text: 'Contributing', link: '/contributing/' },
    { text: 'Github', link: 'https://github.com/PitcherAG/pitcher-js-platform/', iconRight: 'fal fa-external-link' },
    // ... insert new category here
  ],
Each nav entry should contain:
- A
linkattribute for specifying the link location for the new category - The new category's link text
You can refer to the official VuePress documentation (opens new window) for more navbar settings.
# Deploy
After you finish writing documentation and our docs PR gets approved and merged to dev branch, the documentation will be deployed to https://ui.pitcher.com/docs (opens new window) by the github action automatically.
If you would like to try out the documentation online before mergint to dev and going live, you can manually deploy it to github pages by navigating to the root folder of the monorepo and running yarn docs:deploy.
The site will be built and deployed to https://pitcherag.github.io/pitcher-js-platform/ (opens new window)